How Do You Sew a Mitered Corner in 10 Easy Steps
To sew a mitered corner in 10 easy steps, start by measuring and cutting your border strips with seam allowances.
Press the fabric folds to create crisp edges that will make sewing easier and neater.
Next, pin the strip’s center to your project’s edge.
Stitch carefully toward the corner, but stop just before reaching it to avoid bulk.
Now, pin and trim the ‘cat’s ear’ fabric to reduce thickness.
Align the border edges precisely, then sew along the diagonal fold to form the perfect corner.
Finally, trim any excess fabric and press the corner flat for a sharp, professional finish.
Follow these simple steps, and you’ll soon master the art of sewing mitered corners with confidence and ease!
Key Takeaways
- Measure and cut border strips with added seam allowances, marking the center point for precise alignment.
- Fold and press fabric edges twice to create crisp, consistent border widths before pinning to the project.
- Pin midpoint of the border strip to the project’s edge center, then pin corners and every 2-3 inches for accuracy.
- Sew toward corners, stopping 1/8 inch before the edge, backstitching to reinforce seams and pivot for mitered folds.
- Trim excess fabric at diagonal seams, turn corners right side out, press flat, and check for smooth, symmetrical finishes.
Gather Your Materials and Tools
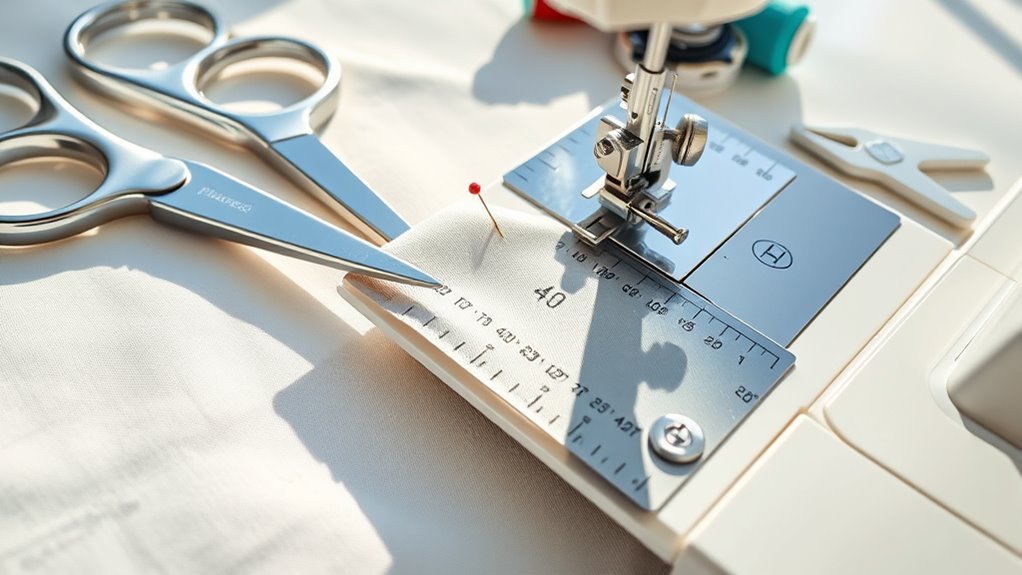
Before you begin sewing, gather all the materials and tools you’ll need to create crisp mitered corners. Start with high-quality fabric like cotton prints or broadcloth, suitable for your project.
Use a precise sewing gauge or ruler to measure and mark seam allowances and border widths accurately. You’ll also need a fabric marker or chalk to draw clean border lines and diagonal guidelines essential for perfect corners.
Keep pins or clips handy to secure fabric edges and maintain alignment while folding and sewing. Finally, have a sharp pair of scissors or rotary cutter ready to trim excess fabric and “cat’s ear” corners, ensuring a neat finish.
Having these tools prepared will make sewing your mitered corners much smoother and more precise. It really helps keep everything neat and easy to handle!
Measure and Cut the Border Strip
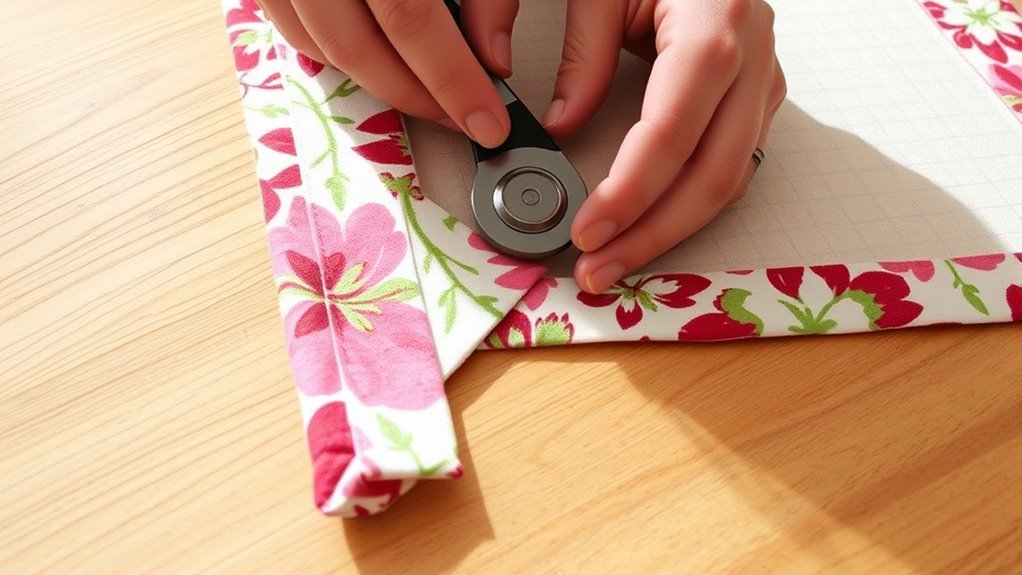
Once you have your tools ready, measure the length of each side of your project and add seam allowances to determine the exact length for your border strips. Use a fabric ruler or measuring tape to double-check all measurements before cutting to guarantee accuracy.
Next, find and mark the center point of each border strip; this helps with precise alignment during sewing. Cut the border strip to the required length, adding extra inches based on your desired border width plus seam allowances.
For symmetrical borders, cut two strips of equal length and width, matching your measurements precisely. Taking these careful steps when you measure and cut the border strip sets a solid foundation for sewing perfect mitered corners.
Press the Fabric Folds for the Border

When you fold the fabric edge over by ¼ to ½ inch, press it firmly to create a crisp crease that will guide your sewing. Next, fold the pressed edge over again to your desired border width, making sure the fold lines are sharp and even.
Use pins or clips to hold the fabric if it tends to shift while you press. Set your iron to the correct temperature for your fabric type, and press each fold firmly to set the creases in place.
Take a moment to verify that the folds are aligned properly and that the border width is consistent along the entire edge. This careful pressing guarantees your mitered corner will look neat and professional.
Pin the Border Strip to Your Project
Although it might seem simple, pinning the border strip correctly is essential for a clean finish. First, fold the border strip in half lengthwise to find its midpoint, then pin that point to the center of your project’s edge.
Align the raw edges, making sure the seam allowance is positioned properly for sewing. Start pinning at the corner, placing pins perpendicular to the edge about every 2-3 inches to prevent puckering. Match any patterns or stripes for seamless mitered corners.
Remember, you’re pinning the right side of fabric to your project’s right side, preparing for stitching. Years ago, I learned these sewing tips: take your time pinning to avoid shifting when using your sewing machine.
This setup ensures your mitered corner turns out precise and clean. Trust me, being patient here really pays off in the final look!
Stitch Toward the Corner Point
Start stitching carefully at the edge, backstitching to reinforce the seam near the corner. Keep your seam aligned as you sew toward the corner point.
This steady approach helps you maintain control and accuracy for a clean finish. Just take it slow and steady, and you’ll get a neat result every time.
Start Stitching Precisely
As you stitch toward the corner point along the marked diagonal line, keep your sewing machine’s needle precisely aligned with the stitch line to guarantee accuracy. Make sure to maintain a consistent seam allowance as you sew, which helps your mitered corner come out sharp and even.
Sew slowly as you approach the corner, giving yourself full control over the stitch placement. Make sure to stop sewing exactly at the corner point; this prevents any excess fabric from distorting your corner.
Backstitch at the very beginning to secure your seam, but hold off on backstitching at the corner until the next step. By focusing on precise needle placement and controlled stitching speed, you’ll set a strong foundation for a clean, professional-looking mitered corner.
Reinforce Stitching at Corner
Once you stop stitching at the corner point, reinforce the seam by backstitching at the start and end of your stitching line. As you sew toward the corner, keep a consistent seam allowance to guarantee a strong, even mitered seam.
Use a short stitch length for added durability, and stop about 1/8 inch before the corner to turn precisely. To strengthen the mitered corner further, consider sewing multiple passes or a small box stitch at the corner area.
This reinforcement prevents unraveling and keeps your project looking neat and sturdy. Taking these steps ensures your mitered corner will hold up well under use and maintain a professional finish.
Maintain Seam Alignment
How do you keep your seams perfectly aligned when sewing toward the corner point? First, keep the fabric flat and firmly aligned to prevent shifting that could throw off the seam. Mark a consistent seam allowance with a sewing gauge or ruler, then stitch precisely along that line.
Maintain a steady sewing speed as you approach the corner to avoid uneven stitches and keep the seam straight. Backstitch at the beginning and especially near the corner to secure the seam’s integrity.
When you reach the corner point, stop with the needle down to lock the seam. This lets you pivot carefully without losing alignment. Keeping the seam allowances matched ensures your mitered corner looks sharp and professional every time.
Fold the Corner Diagonally to Form the Miter
Where exactly should you fold the corner to create a perfect miter? Align the pressed corner point diagonally with the adjacent edges, forming a precise square with intersecting pressed folds.
Make sure your fabric is right sides together so the diagonal fold creates a crisp mitered shape. Use a fabric ruler or seam gauge to double-check the fold’s angle and position for accuracy.
Carefully press the diagonal fold to set the foundation of your mitered corner. Pin the fold in place to hold everything steady before stitching.
This precise folding and pressing ensure your miter lays flat and neat, setting you up perfectly for the next steps in sewing a flawless corner.
Pin and Trim the ‘Cat’s Ear’ Section
After pressing the diagonal fold to form your mitered corner, you’ll notice the small triangular excess fabric known as the ‘cat’s ear.’ Pin this section carefully to keep it secure before trimming.
Pin the small triangular ‘cat’s ear’ after pressing the fold to secure it before trimming.
Use sharp scissors to trim about ¼ inch (6mm) from the cat’s ear, cutting evenly along the diagonal fold line. This reduces bulk and guarantees a smooth, professional edge.
After trimming, press the cat’s ear flat to set the seam, which prepares it for folding and stitching. Be sure to remove the pins carefully after trimming to avoid shifting the fabric.
Taking these steps will help your mitered corner lie flat and look crisp in your finished project.
Align and Pin the Border Edges
Start by carefully aligning the raw edges of your border pieces, making sure any patterns or stripes line up perfectly. Then, pin the edges together at the corner, working from the center out to keep everything in place.
Use consistent pin spacing and check your alignment with a ruler before you sew to guarantee a clean, professional corner. It really helps to take your time here so everything looks just right!
Edge Alignment Techniques
Although it can be tempting to pin quickly, you’ll get the best results by carefully aligning the border edges before securing them with pins or clips. Proper edge alignment ensures your mitered corner looks polished and professional.
Here’s how to nail this step: Match pattern stripes or selvage edges across the seam for a seamless appearance. Pin along the entire border length, focusing on corners and where edges meet to avoid shifting.
Slightly ease or stretch the fabric as needed to keep edges flat and even while pinning. And don’t forget to check alignment at several points to maintain a consistent border width around your project.
Taking these steps will help you sew perfect mitered corners every time. It’s worth the little extra effort!
Effective Pinning Strategies
When you align and pin the border edges carefully, you set the foundation for a flawless mitered corner. Start by matching fabric patterns or stripes at the edges to guarantee a seamless appearance.
Use pins or clips placed perpendicular to the edge; this keeps the fabric flat and prevents shifting while sewing. Pin at regular intervals, focusing on corners and pattern matches.
For added stability, reinforce corners by pinning diagonally across the mitered edges. This strategy maintains accurate alignment throughout stitching.
| Pinning Tip | Purpose |
|---|---|
| Perpendicular Pinning | Keeps fabric flat and stable |
| Pattern Matching | Ensures seamless visual flow |
| Diagonal Corner Pinning | Maintains corner alignment |
Stitch Along the Folded Seam Line
As you sew along the folded seam line, keep your stitches close to the pressed fold to achieve a neat finish. This precision guarantees your mitered corner looks sharp and professional.
Follow these steps to stitch accurately:
- Set your machine to a straight stitch for clean, even lines.
- Maintain a consistent seam allowance, typically 1/4 inch (6mm), for uniformity.
- Backstitch at the start and end to secure your stitches and prevent unraveling.
- Slow down when approaching the corner to keep your stitch line straight and precise.
Taking your time and following these tips will help you create a flawless seam that really enhances your mitered corner’s overall appearance.
Trim Excess Fabric and Press the Finished Corner
After stitching along the folded seam line, the next step is to trim the excess fabric close to the diagonal seam. Trim about 2mm (1/8 inch) away from the seam to reduce bulk and keep your corner neat. Use sharp scissors or a rotary cutter to avoid cutting into the stitching.
Then, turn the corner right side out and gently push out the point for a sharp edge. Press the corner carefully with an iron to flatten the trimmed edges and set the shape. Check for smoothness and symmetry, pressing again if needed to perfect your mitered corner.
| Step | Tool Needed | Tip |
|---|---|---|
| Trim excess fabric | Scissors/Rotary Cutter | Cut 2mm from seam |
| Turn corner out | Hands | Push point gently |
| Press corner | Iron | Set shape, flatten edges |
Frequently Asked Questions
How to Sew Mitered Corners on Fabric?
You fold and press fabric edges twice, then fold the corner diagonally. Sew along the diagonal, trim excess fabric.
Turn it right side out, push out the corner, and press for a sharp, neat mitered corner finish.
It’s a simple technique that really makes your project look polished. Just take your time with each step, and you’ll get great results!
What Is Mitered Corner in Bed Making?
A mitered corner in bed making is where you fold fabric diagonally at edges, creating a clean, angled corner. It prevents bunching and fraying, giving your bedding a sharp, professional, and tailored look.
It’s a neat trick that really ups the style of your bed. Plus, it keeps everything looking crisp and tidy, which is always a win!
How to Make Boxy Corners?
Making boxy corners is like folding a perfect origami crane. You fold each corner diagonally, pin, sew along the seam.
Then, trim the excess fabric. After that, turn and press for sharp, crisp edges on your project.
It really helps give your work a neat, professional look. Plus, it’s easier than it sounds once you get the hang of it!
How to Do Corners on Quilt Binding for Beginners?
You’ll fold the binding at a 45-degree angle at each corner, sew close to the edge, then fold and press it neatly.
Pin carefully, sew slowly, and trim excess fabric to avoid bulk for clean, beginner-friendly corners.
Taking your time with each step really helps make those corners look sharp and professional. Give it a try—you’ll get the hang of it in no time!
Conclusion
Now that you’ve mastered sewing a mitered corner, you’ll see it’s less tricky than it seems. This technique proves that patience and precision truly pay off, turning simple borders into polished edges.
By carefully aligning and stitching, you’re not just finishing a project—you’re crafting a detail that elevates your work. So, don’t rush; embrace each step.
The beauty of sewing lies in these small, thoughtful moments that make all the difference. Sewing mitered corners might seem challenging at first, but with practice, it becomes an easy and rewarding skill.
Remember, mastering this technique adds a professional touch to your sewing projects, making your finished pieces look neat and stylish. Keep practicing, and soon sewing perfect mitered corners will feel like second nature!